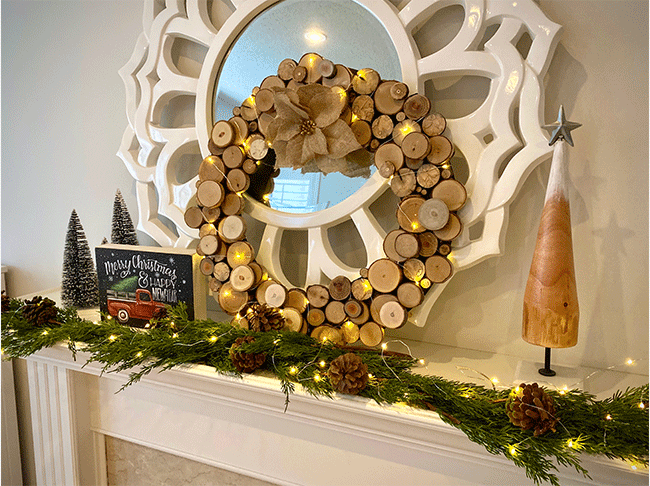
COMPLETED
PROJECT
DURING
DURING
DURING
DURING
DURING
’Tis the season to be jolly and creative. What better way to decorate your home than a Rustic Wreath that you created? Using real wooden branches and sticks, you will be able to build an awesome and unique Christmas wreath. Follow along the easy DIY steps and enjoy the holidays. Merry Christmas!!
Step One
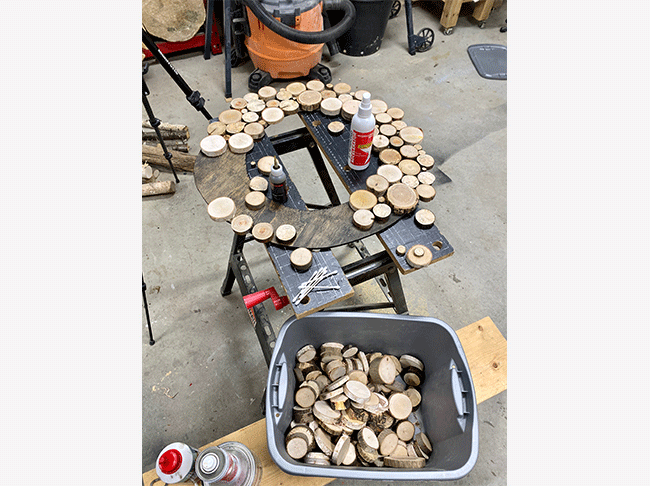
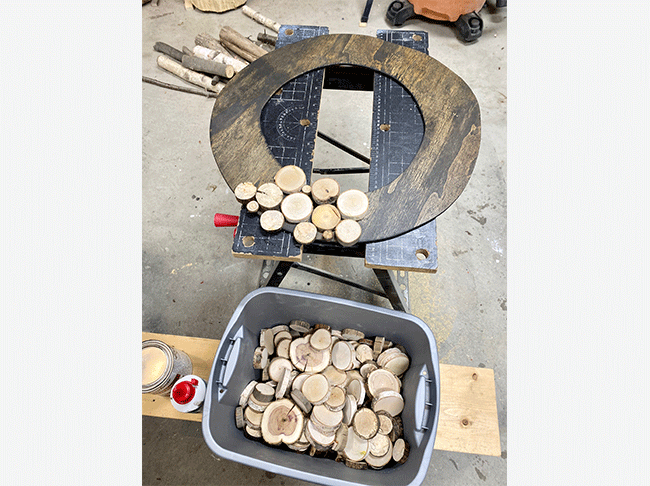
Using extreme care, slice up the assorted branches to approx. 1/2” slices/discs. I used a mitre saw; however, this is also possible using a table saw (with a sled) handsaw or bandsaw.
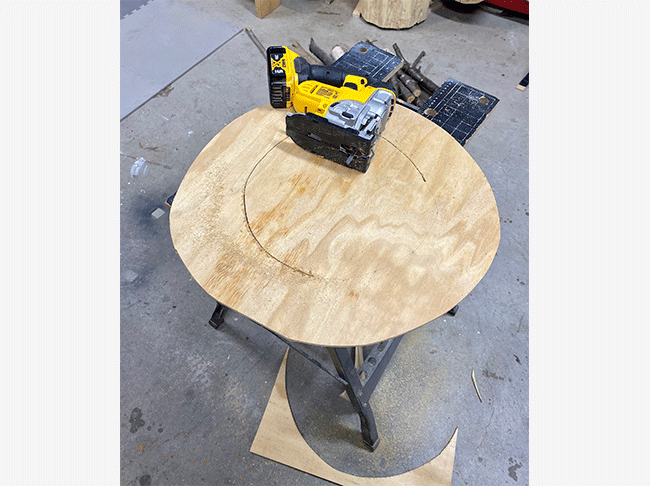
Step Two
Using a jigsaw, cut an uneven circle to mimic the natural shape of a wreath. The thickness should be about 4” wide.
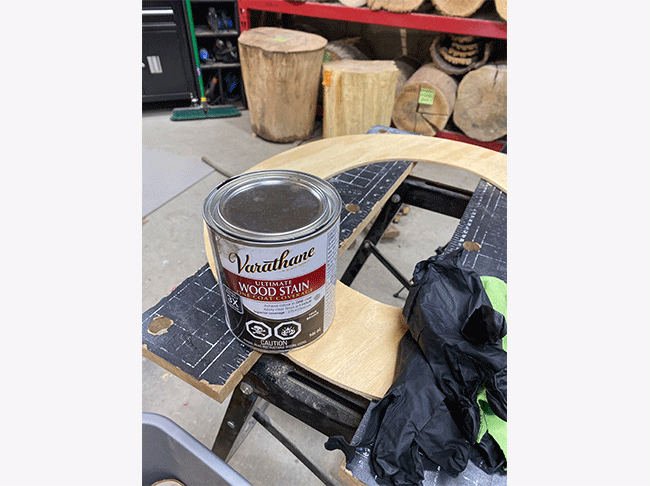
Step Three
Using Varathane Ultimate Wood Stain in True Brown, stain the entire circular backboard as per the directions on the can.
Step Four
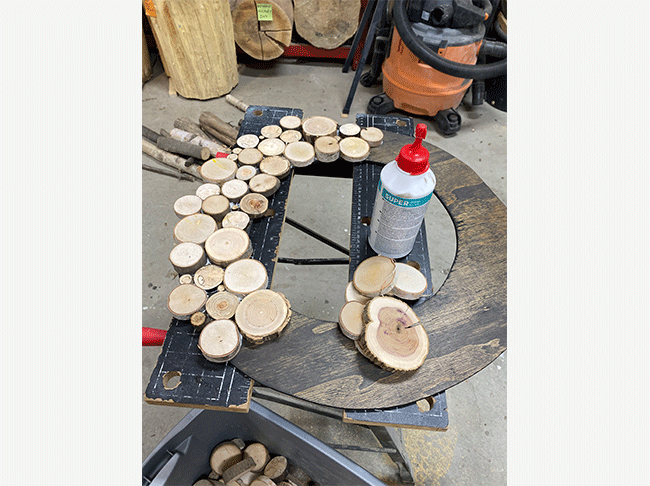
Using wood glue or CA glue, go around the entire circle gluing on wood discs. Try to mix up the variety of wood and sizes in a random order. Add several layers. Using Varathane Ultimate Wood Stain in White Linen, stain several wood discs white.
Step Five
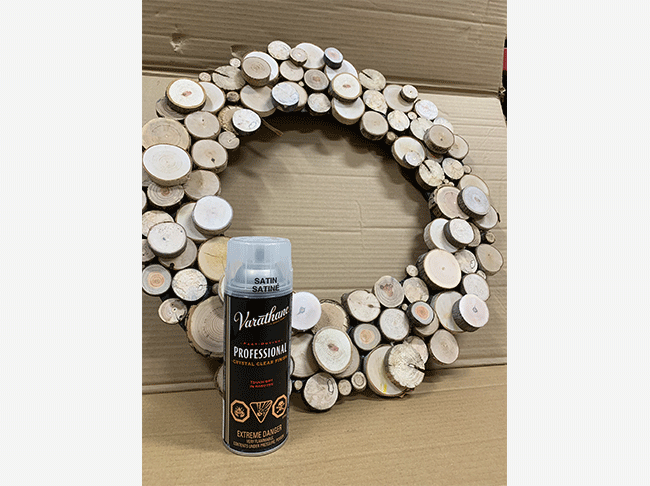
Using Varathane Professional Crystal-Clear Finish, spray the entire wreath several times as per the instructions on the can.
Step Six
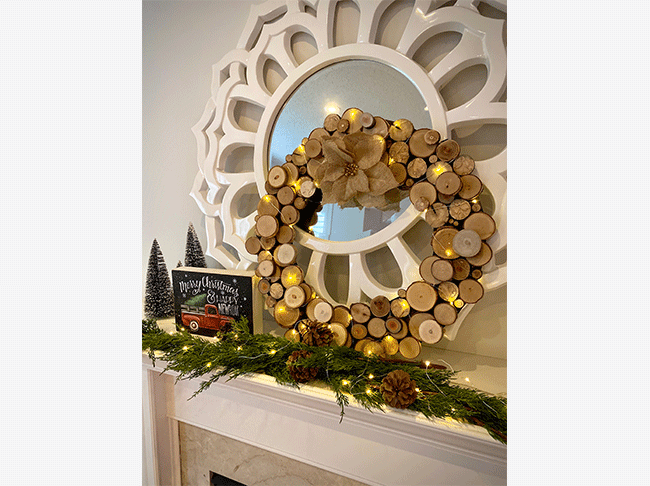
Let your own creative style shine through! Optional Ideas:
-String lights
-Add a bow or some garland
-Spray with fake snow
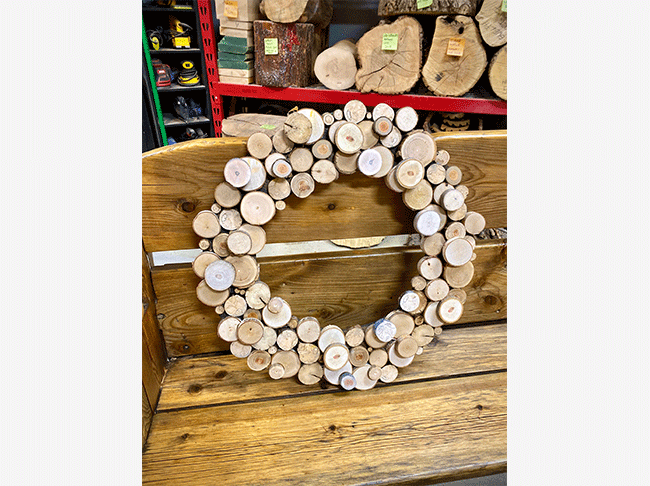
The final wreath can either be hung using hanging hardware or a rustic rope or leaned against a wall or rear support.
Merry Christmas to everyone!!!!
Visit Rust-Oleum Canada and The Stump Shop on Instagram for more tips and inspiration!
#WE_WOOD
Prepared by The Stump Shop
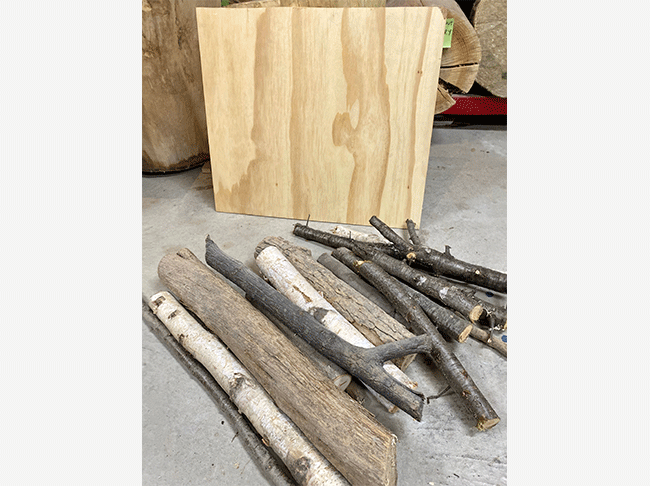
Other Materials:
- 24” x 24” sheet of ¼” plywood
- An assortment of branches and sticks
- Wood glue or CA glue
- Hanging hardware (optional – can also be leaned)
- Optional string lights
Discover More Projects
Locate a Rust-Oleum Retailer