Before
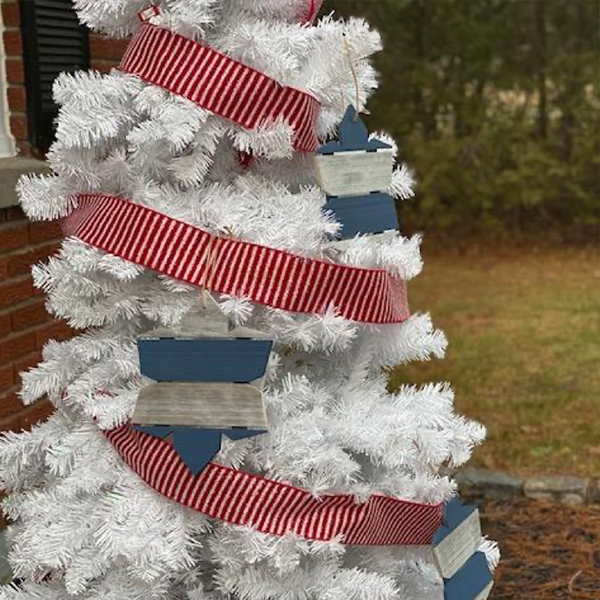
2020 has been a different year, and the holiday season is no, well, different! Why not have some fun and whip up an Oversized Modern Tree Ornament for your tree? This is the year to do it!
- Shake can of Rust-Oleum primer vigorously for one minute after the mixing ball begins to rattle and apply according to the directions on the can. Primer should dry for 24 hours.
- Apply Glitter spray paint in two or more light coats a few minutes apart, following the directions on the can.
- Apply the Clear Glitter Sealer after letting the Glitter dry for a few minutes.
- Glitter & Glitter Sealer will be dry to touch in 20 minutes and to handle in 1 hour. Fully dry in 24 hours. Recoat at anytime.
STEP 1 (THE CUT LIST):Cut your plywood to the following dimensions:
- Three rectangles that are 14” tall x 10” wide
- TOP and BOTTOM: Cut 6 pieces to 3” wide and 9.5” long
- MIDDLE: Cut 6 pieces to 2 ⅝” wide and 9.5” long
- BACK: Cut 6 pieces to 1” wide x 6.5” long
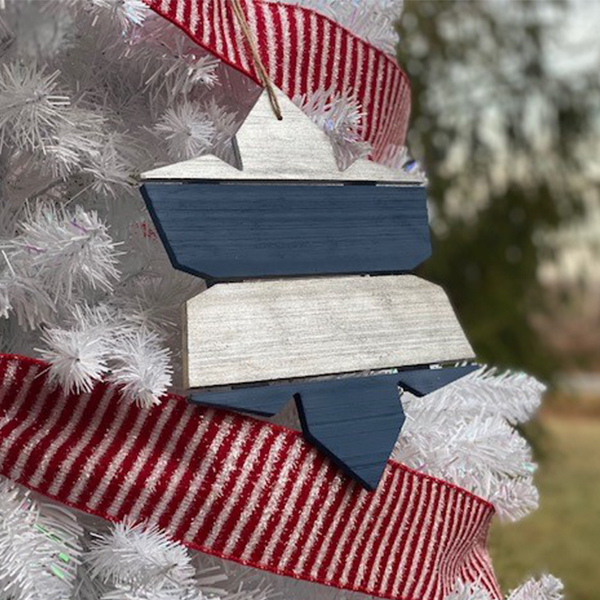
STEP 2 (SHAPING): You can pick any shape that you like; I chose a snowflake. But, you could do a star, a tree, a diamond, etc. I find it helps to group your cut pieces together so that you have four strips in each. From there, I used painter’s tape to hold the strips of plywood together while I drew my shape onto my plywood.
TIP: Using a straight edge, like a ruler, is the best way to ensure you get nice clean lines.
STEP 3: Once you are happy with your shape, it’s time to make your cuts. I used a table saw for most of my cuts and then cleaned the inside corners on the tops and bottoms with a jigsaw, but you can use a jigsaw for everything, too.
STEP 4: Once things are cut, sand everything with 150-grit sandpaper. Then, wipe with a rag and sand with 220-grit sandpaper. Then, I painted three ends and three middles with Chalked Ultra Matte Paint in Coastal Blue. I sealed these pieces with Chalked Protective Topcoat and the other pieces are painted with Rust-Oleum Specialty Mirror Effect.
STEP 5: Lay your pieces face down, and use a scrap piece of plywood as a spacer to give a little gap between pieces. Then, nail two (one on both sides) of the small strips onto the backs of each piece.
STEP 6: Once everything is together, drill a hole at the top for your burlap string to go through, find yourself a tree and get those holiday drinks flowing!
Visit Rust-Oleum Canada and Remarkable Woodworks on Instagram for more tips and inspiration!
#WE_WOOD
Other Materials:
- Half sheet of ¼” plywood
- Saw (jigsaw/table saw)
- Burlap string
- Pneumatic nailer (I used a 23g but a standard 18g will work too) with 3/8” nails
- Clamps
- Wood Glue
- Tape Measure
- Drill with ¼” drill bit
- Sandpaper: grits 150, 220
- Gloves
- Painter's Tape
- Pencil
- Safety Equipment
Locate a Rust-Oleum Retailer