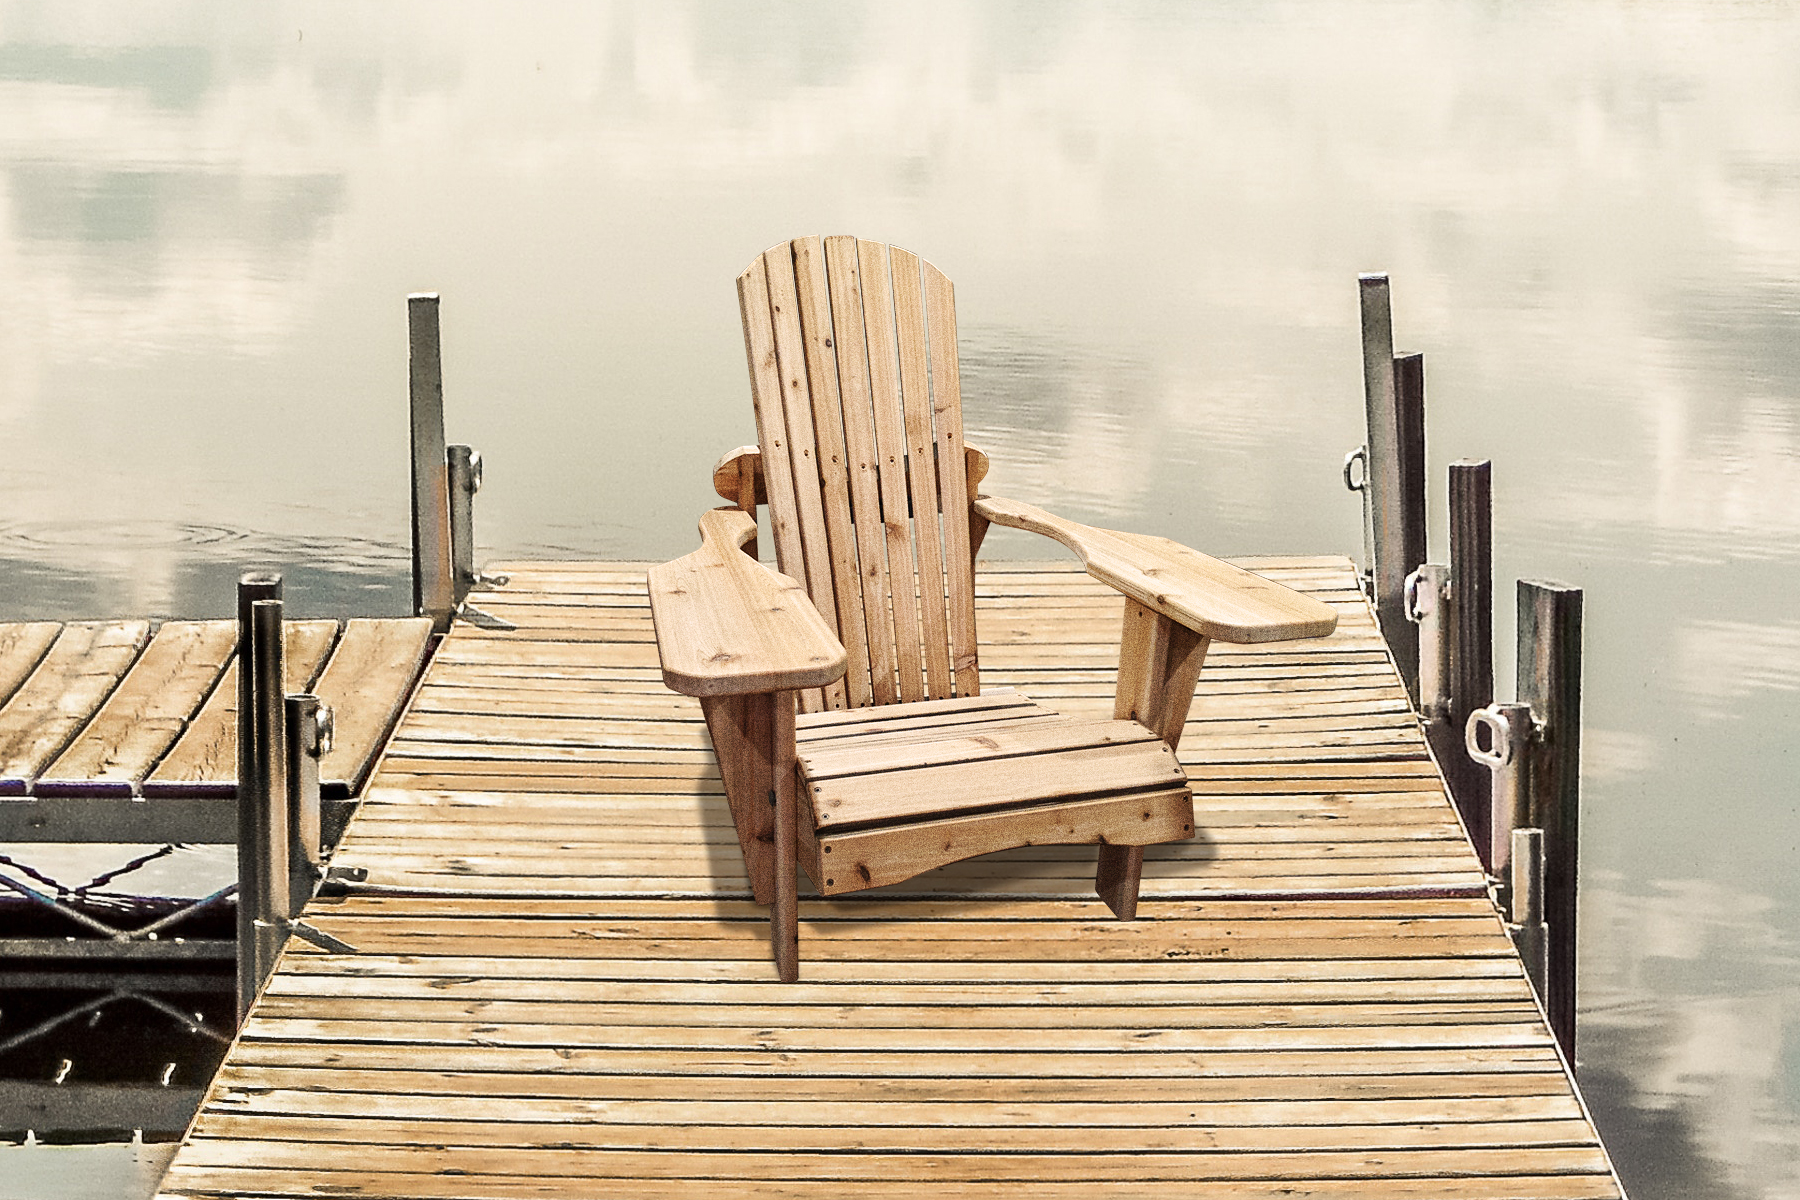
After
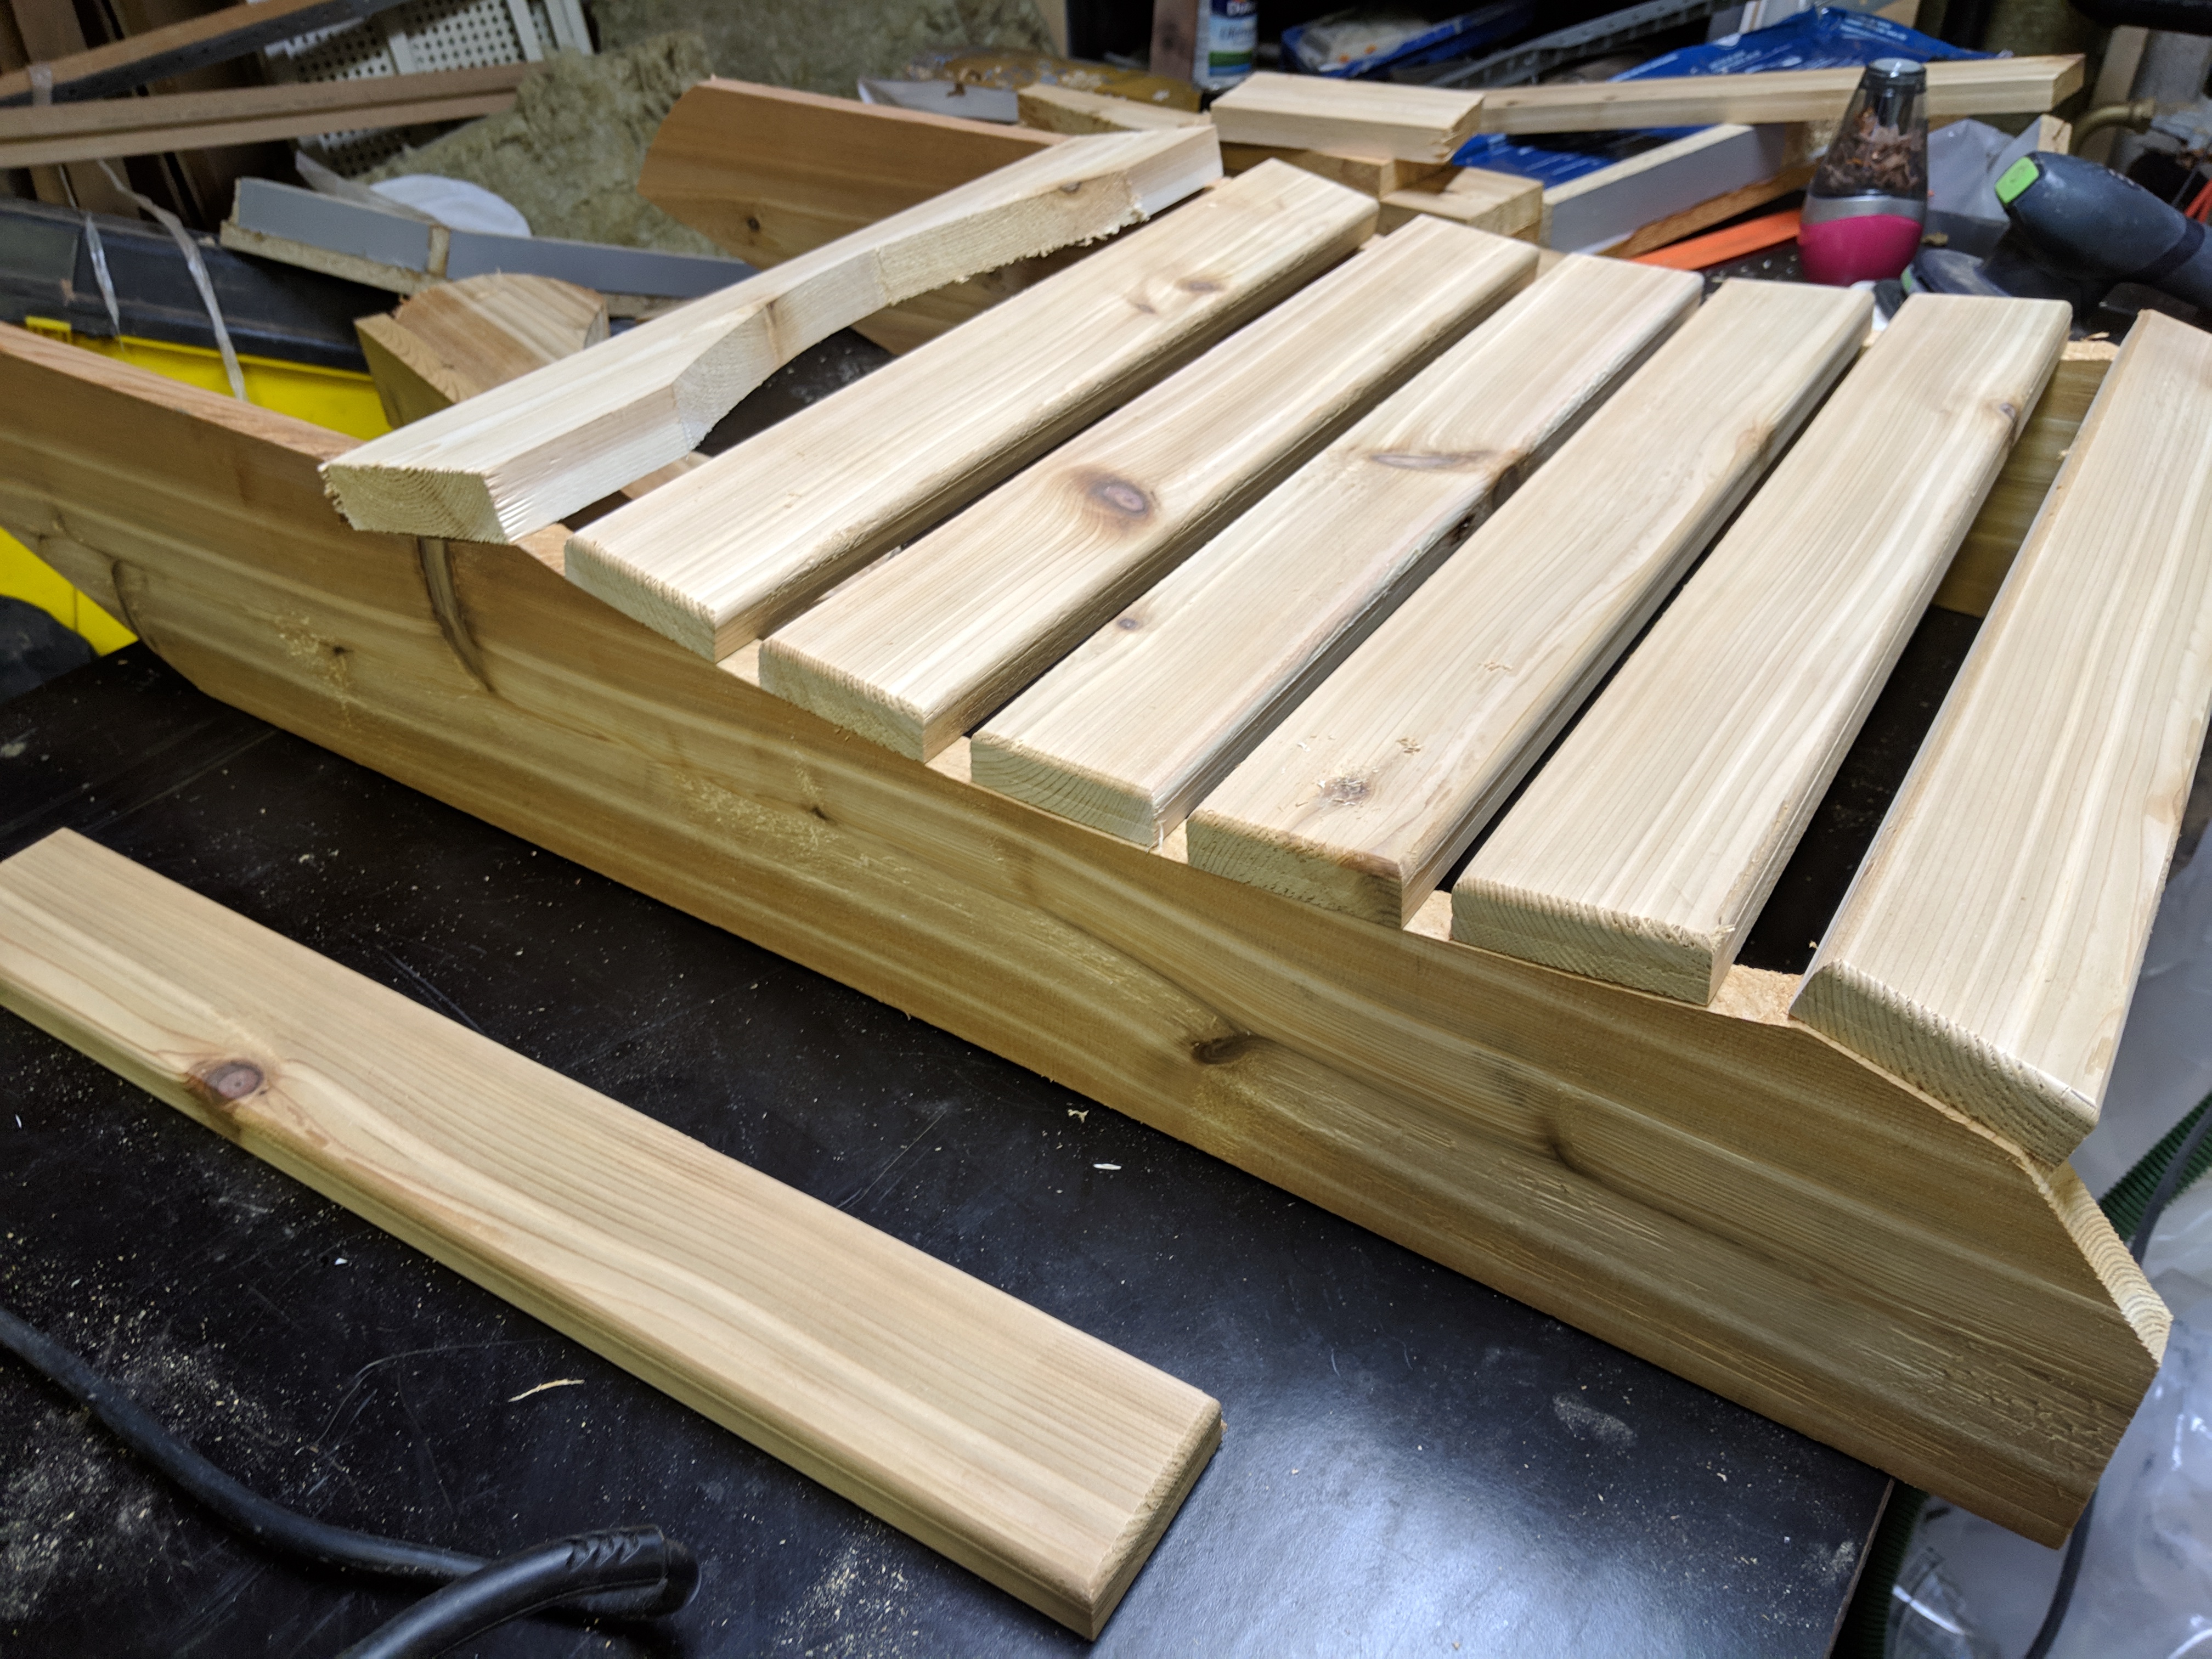
Before
Follow JK Custom Wood’s steps to make yourself a Muskoka chair that’s perfect for catching a few rays during a summer you’ll never forget.
Step 1: Mark 3.5” in from each end of the Lower Back Slat Cradle. Then, mark the center of the bottom edge and measure up 2 1/8” on the Lower Back Slat Cradle. Create an arc between all 3 points and cut out using a jigsaw or bandsaw.
Step 2: Mark 4 3/8” in from each end of the Upper Cradle. Then, mark the center of the bottom edge and measure up 2 ¼”. Create an arc between all 3 points and cut out using a jigsaw or a bandsaw.
Step 3: Using a bandsaw or a tapering jig on the table saw, cut the Back Slats so they are 2” wide at the top and 1 ¾” at the bottom. This will create the ‘fan’ effect for the back of the chair. Be sure to cut off 1/8” from each side opposed to ¼” off of only one side.
Step 4: Place Back Slats on a workbench and space them ¼” apart using small blocks or strips. Secure them in place so they do not move. Measure down 10” from the top of the center slat and make a mark. Using a string, pencil and nail, create a compass from the 10” mark and draw out the arc for the top of the chair. Unsecure the pieces and cut the arc using a jigsaw or band saw.
Step 5: Sand all faces and edges with 120 grit sandpaper and work your way up to max. 150 grit. Pro tip: Use a 1/16” or 1/8” round over bit on all edges for those true Muskoka chair edges.
Step 6: Pre-drill & countersink all screw holes to avoid any splitting.
Step 7: Assemble the chair from the bottom up. Begin with the legs, add the seat slats and arms and then move onto the back. Use 1 ½” screws on 1” thick pieces. Pro tip: Use an outdoor or waterproof wood glue for added strength.
Step 8: Apply Varathane Ultimate Wood Stain in Briarsmoke.
Step 9: Apply Varathane Diamond Wood Finish – Outdoor to seal and protect.
Step 10: Sit back and enjoy!
Visit Rust-Oleum Canada and JK Custom Wood on Instagram for more tips and inspiration!
#We_Wood
Other Materials:
- 2 – 3 ¼ x 5 ¼ x 3 ½” boards – Arm Support Block
- 1 – 3 ¼ x 19 x 2 ½” board – Front Stretcher
- 1 – 1 x 19 x 3 ½” board – Lower Back Slat Cradle
- 1 – 1 x 19 and seventh eigths x 4 ½” board – Upper Cradle
- 7 – ¾ x 19 ½ x 2 ½” boards – Seat Slats
- 7 – ¾ x 34 x 2” boards – Back Slats
- Bandsaw
- Table Saw
- Drill
- ~88 - #8 1 ½” stainless or galvanized screws
- 8 - #8 2 ¼ x 3/8” stainless or galvanized lag bolts
- String
- Pencil
- Nails
- 120 grit and 150 grit Sandpaper
Locate a Rust-Oleum Retailer