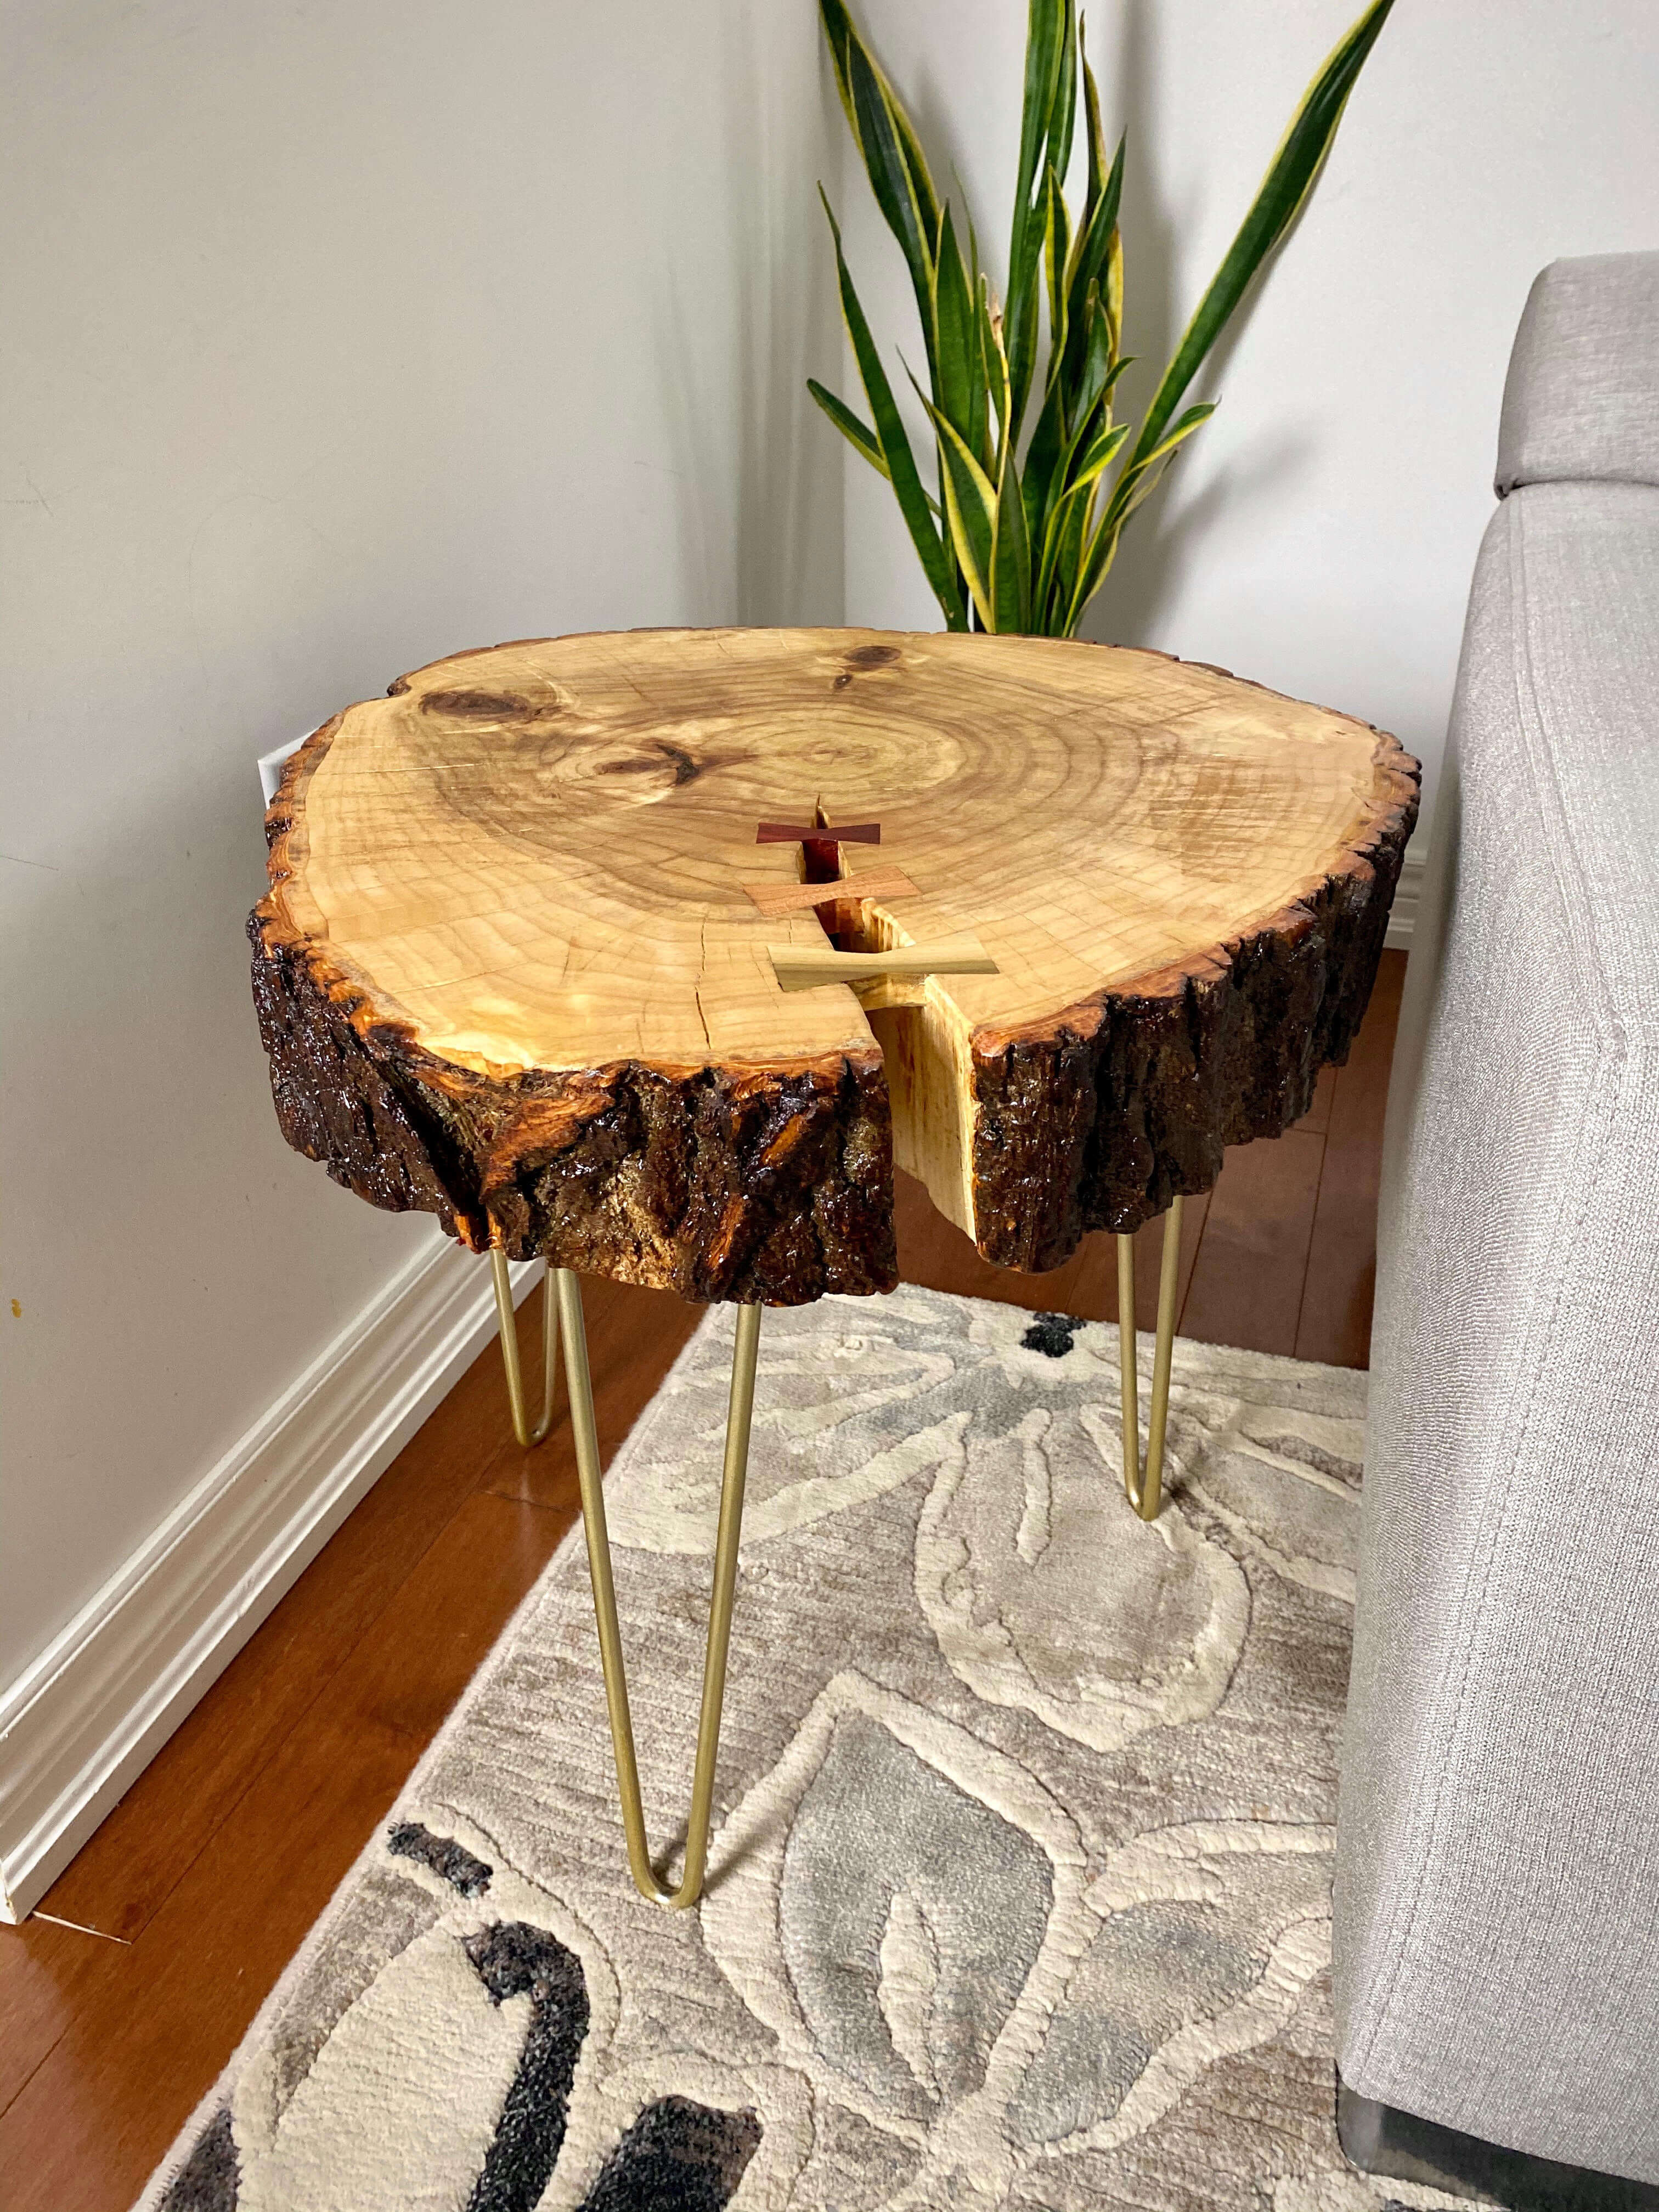
AFTER
Take a piece of nature and transform it to a beautiful piece of home décor. Follow along to see how you can turn a reclaimed wood slice into a functioning side table in your home.
STEP 1: Finding your wood slice.
Finding a suitable piece of wood is the first step. If this is your first reclaimed wood project, it is advisable to seek the help of a wood mill, experienced woodworker or other trustworthy source. “Green” wood has to be dried properly either in a kiln or through natural air drying prior to being finished. Raw wood slices can either be reclaimed yourself or purchased as a DIY piece ready to be finished. Ensuring the piece of wood is completely dry is crucial. Finishing a stump that has a high moisture content can result in a poor finish and eventually deterioration or cracking of the wood.
STEP 2: Cleaning up your wood slice.
Any dirty areas in your wood slice need to be cleaned out using a variety of small tools. The inner cracks and bark need to be cleaned of any loose wood fibres or debris.
-Using small pliers, files, chisel and sandpaper, clean out any cracks.
-The bark can be cleaned using a wire brush to loosen and remove any debris.
STEP 3: Levelling your wood slice.
To be able to use properly as a side table, your piece of wood must be levelled so that it sits flat.
-There are different ways to achieve this result. The most common would be a router sled, which uses a router to evenly flatten out your wood slice. To make this easier to achieve as a DIY project, let’s focus on an electric hand planer and belt sander.
-Using an electric hand planer, set the depth to the lowest possible amount and flatten the top ofthe wood starting at any high points.
-Using a belt sander with very coarse grit (40 or 50) can greatly assist with removing material and flattening out the wood top.
STEP 4: Sanding your wood piece.
Progress through several grits of sandpaper starting with a 60 grit, moving to an 80 grit then 150 grit and finishing with a 220 grit. A random orbital sander is suggested, but this can also be achieved by hand sanding.
STEP 5 (Optional - Skip to STEP SIX if desired): Inserting bow ties into the wood slice.
**Advanced woodworking skills required for this optional step**
-Find bow ties that fit into your specific project piece.
-Trace the bow ties in position with an X-acto knife.
-Using a router with a ¼” straight bit, remove the wood material from where the bow tie will sit.
-Using a hand chisel, clean up the straight edges of the bow tie crevice.
-Apply wood glue and insert bow tie into crevice, bang in with a rubber mallet.
-Using a flush cut saw, trim any excess bowtie that protrudes out of wood.
-Sand flat up to 220 grit again.
STEP 6: Painting the bark with epoxy (to prevent bark from chipping off over time).
-Following the instructions on the Varathane Bar & Table Finish Epoxy label, mix the resin and hardener properly and apply with a brush all around the outer bark.
-Allow to dry overnight, clean up any drippings on the bottom side of the wood and sand the top if there was any excess epoxy.
STEP 7: Attaching the legs.
-Using wood screws, attach your furniture legs to your piece.
-The hairpin legs used in this project were sprayed using Rust-Oleum Universal Metallic Spray Paint and Primer in Gilded Brass then clear coated with Tremclad Rust Paint Spray in Clear Satin.
STEP 8: Applying wood finish.
-Apply several coats of Varathane Natural Oil Finish in Clear Satin according to the directions on the label.
Your project is complete. Good job, and thank you for following along.
Visit Rust-Oleum Canada and The Stump Shop on Instagram for more tips and inspiration!
#WE_WOOD
Other Materials:
- Reclaimed Wood Slice
- Wood Screws
- Metal Hairpin Legs (or any suitable furniture legs of your choice)
Discover More Projects
Locate a Rust-Oleum Retailer